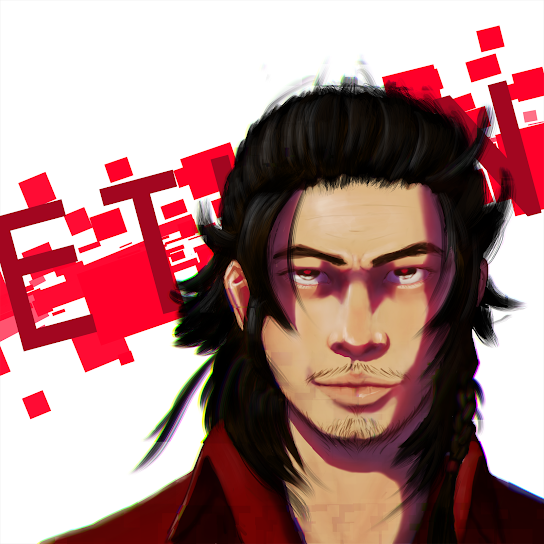
Portrait Study
Self-portrait practice. I needed a profile pic anyways.
I have decided on my art style. It honestly stems from this. I could just change up proportions to make something anime-ish anyways.
I started with a sketch in a layer mask.
Once I am comfortable with it, I begin silhouetting the piece.
Once I am comfortable with it, I begin silhouetting the piece.
After that, I clip the sketch on top of the silhouette and start converting it into ambient occlusion.
After that, I block in the shadows through layer masks, then I refine them. Soft edges on curved surfaces, Hard edges on angular surfaces. Though it's not really hard edges. It's a small round soft brush. The only time True crisp hard edges are used is if the shadow travels a very short distance. I add in the lighting by inverting the shadow mask, After that, I add in the basic colours and then the texturesI then add subsurface scattering, Which's mainly located where light and shadow meet. The surface composition must be taken into account, not all subsurfs are created equal. The colour might be different depending on the material. I mainly add subsurface scattering on skin. So it is of a reddish hue. Subsurface scattering is needed to make the subject look alive. It prevents it from looking like plastic. Lastly, I add highlights. If you can observe, the hair is treated like a big solid shape at first, then at the last moment where everything is finalized, hair is then rendered. I find my current method to be difficult to apply on hair.
It's just like how open-world video games render. Start with simple shapes, then add details. Basic shapes are essential. A good composition from basic shapes will give a good result.
The aim here was to answer the question: Can I change a few major things while not having to do things all over again? And the answer was yes. Because of the way the process is set up, I could change the lighting. I changed the furrow to be less prominent. Changed the lighting intensity Didn't even take me 10 minutes.


Comments
Post a Comment